Introducing Iteration
Introduction
We will cover iteration in more detail in Chapter Six but we want to introduce it now as you will almost always use iteration and lists together.
Iteration allows us to re-use code without having to copy and paste.
Let's look at an example. Let's take our bread_types list, which looks like
this:
bread_types = [
    'sourdough',
    'croissant',
    'tip top',
    'artisan',
    'chocolate'
]
Let's say we want to print out a list that looks like this:
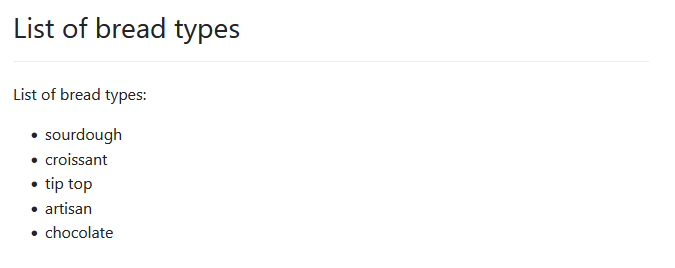
Without iteration, we'd have to write something like this:
---
mandatory: True
question: List of bread types
subquestion: |
  List of bread types:

  * ${bread_types[0]}
  * ${bread_types[1]}
  * ${bread_types[2]}
  * ${bread_types[3]}
  * ${bread_types[4]}
---
code: |
  bread_types = [
    'sourdough',
    'croissant',
    'tip top',
    'artisan',
    'chocolate'
  ]
---
Firstly, look at lines 7 to 11 and you can see the type of copying and pasting that's involved. We are simply copying the bulk of the first line:
* ${breadtypes[0]}
and replacing the 0 with the index as we go. This kind of copying and pasting
is a sure-fire indicator of the need to use iteration.
Second, imagine if we had 1,000 bread types. Now our inconvenience becomes a huge effort for a 1,000-element list. Not to mention the possibility of introducing errors.
Third, what happens if we wanted to add a new item to the list? Or remove an item from the list? Each time we make an alteration we need to modify the code in two places - the list data (in the code block) and the list display commands in the mandatory question block. Again, this is inefficient and it's very error prone.
The history of coding is littered with errors arising from unnecessary copying and pasting of code.
What we want is not to tell Docassemble to display each item indivdually. Instead, we want to tell Docassemble this:
Display all the items in this list from top to bottom as a bullet list.
That's a good summary. Let's re-phrase it:
Display each item in this list in turn from top to bottom as a bullet list.
Make sense? Let's re-phrase it again, this time using the 'I'-word:
Iterate over each item in the list displaying each item as a bullet list item.
Still with us? Let's re-phrase it in a more code-like way:
For each item in the list, display it as a bullet list item.
Iteration and loops
loops are what we call the code we use to carry out iteration. Many programming languages, Python included, have more than one way to construct a loop. But for the purposes of this textbook we will focus on 'for' loops.
The basic premise of a 'for' loop can be stated as this:
for each element in a list, do something
Let's apply this to our re-prhasing exercise above. Let's take that last statement and repeat it here as we're going to use it:
for each item in the list, display it as a bullet list item
In sequence what a 'for' loop does is this:
- It gets the items in the list
- One at a time, it copies each item into a separate variable for processing
- It then processes that separate variable and does whatever the 'do something' instructions are.
- Once it's finished carring out the 'do something' part, then the next item is placed into the separate variable and the cycle repeats.
Let's look at a flowhcart of how this works:
'For' loop syntax
The basic format of a for loop is as follows:
for item in list:
    do_something
The words for and in are reserved words.
When Python sees these words in this order then it knows that it needs to
process a for loop.
item and list are variables. list
is our list data. item is new and Python uses that as the 'special variable'
in which to place each list item. Any variable name can be used here and good
practice is to use element or item as a 'special variable' or to use a singluar
noun that reflects the list data. For example, this is a valid loop to process
our bread_types list:
for bread_type in bread_types:
    do_something
or
for a_bread_type in bread_types:
  do_something
The special variable can be any name. It's best to choose a name that is descriptive.
The do_something part of the loop is the body of the loop. It can contain
more than one line but, in the Python format at least (more on this below),
each item of the loop body must be indented.
Here's an example that copies the bread types from the bread_type list into
another list (good_types). The if statement in the code makes sure that
tip top is not copied across. At the end of the loop we add a new bread type
to good_types. Note how that last line is not indented. That means it is
not processed as part of the loop.
good_types = []     # Initialise good_types to an empty list
for bread_type in bread_types:
    if bread_type != 'tip top':
        good_types.append(bread_type)
good_types.append('foccaccia')
We use for loops to copy one list to another a lot. It's a very useful way of filtering out unwanted elements from lists (like we just did above).
Python Format and Mako Format
So far we have discussed for loop syntax in 'Python format'. That is, the syntax is something a Python programmer would understand. Practically, we'll see this syntax in code blocks.
Docassemble provides another way to write for loops. This Mako Format is usually used in when the loop must be embedded in with other Markdown text, such as inside a subquestion blocks.
Mako format loops work in the same way as regular for loops, and syntactically they are quite similar, but they do contain some differences so Docassemble knows to treat them as loops and not just as text.
The basic format is as follows:
  %for item in list:
  do_something
  %endfor
In Mako format we must precede the for with a % (ie: %for). The %
character tells Docassemble that what follows is a command and not just the
word 'for'.
The body of a loop can't be indented in Mako format. That's because Markdown treats indentation of four spaces or more as a special command.
Because the loop body can't be indented, Mako format introduces a %endfor line
to delimit the end of the loop.
Similarly to the Python format, everything between %for and %endfor constitutes
the loop body.
Mako format loops are used most commonly in subquestion blocks and are usually used to display items in a table, or to 'dress up' items. A good example is our original issue - formatting list items as a bullet list! We can do that using this:
  %for bread_type in bread_types:
  * ${bread_type}
  %endfor
The body of the loop adds a * before each bread type, which is the
markdown for displaying a line as a bullet list item.
Let's take that example and plug it back into our original code:
---
mandatory: True
question: List of bread types
subquestion: |
  List of bread types:

  %for bread_type in bread_types:
  * ${bread_type}
  %endfor
---
code: |
  bread_types = [
    'sourdough',
    'croissant',
    'tip top',
    'artisan',
    'chocolate'
  ]
---
First thing worth noting is that we've cut down the number of lines of code to
display the bullet list from five to three. More importantly though, those same
three lines of code will display a list containing any number of bread types.
Moreso, as we change the number of items in bread_types we can leave our
loop code unchanged.
We are officially in code efficiency nirvana.

More on iteration
Iteration is one of the most powerful coding concepts you will learn. We have only touched on iteration in this chapter. Docassemble provides a rich set of tools to iterate over list data, including table blocks and groups. We will cover these in more detail in Chapter Six.
Iteration and lists go hand-in-hand. Lists are how data is provided to iterate oveIteration and lists go hand-in-hand. Lists are how data is provided to iterate over. We will usually go to great lengths to take data that is not in a list and somehow copy, filter or otherwise convert it into a list so that we can take advantage of iteration.
If you are deep in your coding and you find your self copying and pasting the same lines of code over and over while making small changes... Don't!! That's a good indication that you need to get your data into a list and use iteration to process it.